
Page Creation
The Mimic function is used to create and edit mimic pages. A mimic page displays equipment, piping, and measurement data as a graphic. Mimic pages are stored in the page tree and are displayed on the monitoring screen.
Each page contains drawing objects, library parts, and data display objects. This section describes how to create, open, duplicate, and delete a mimic page.
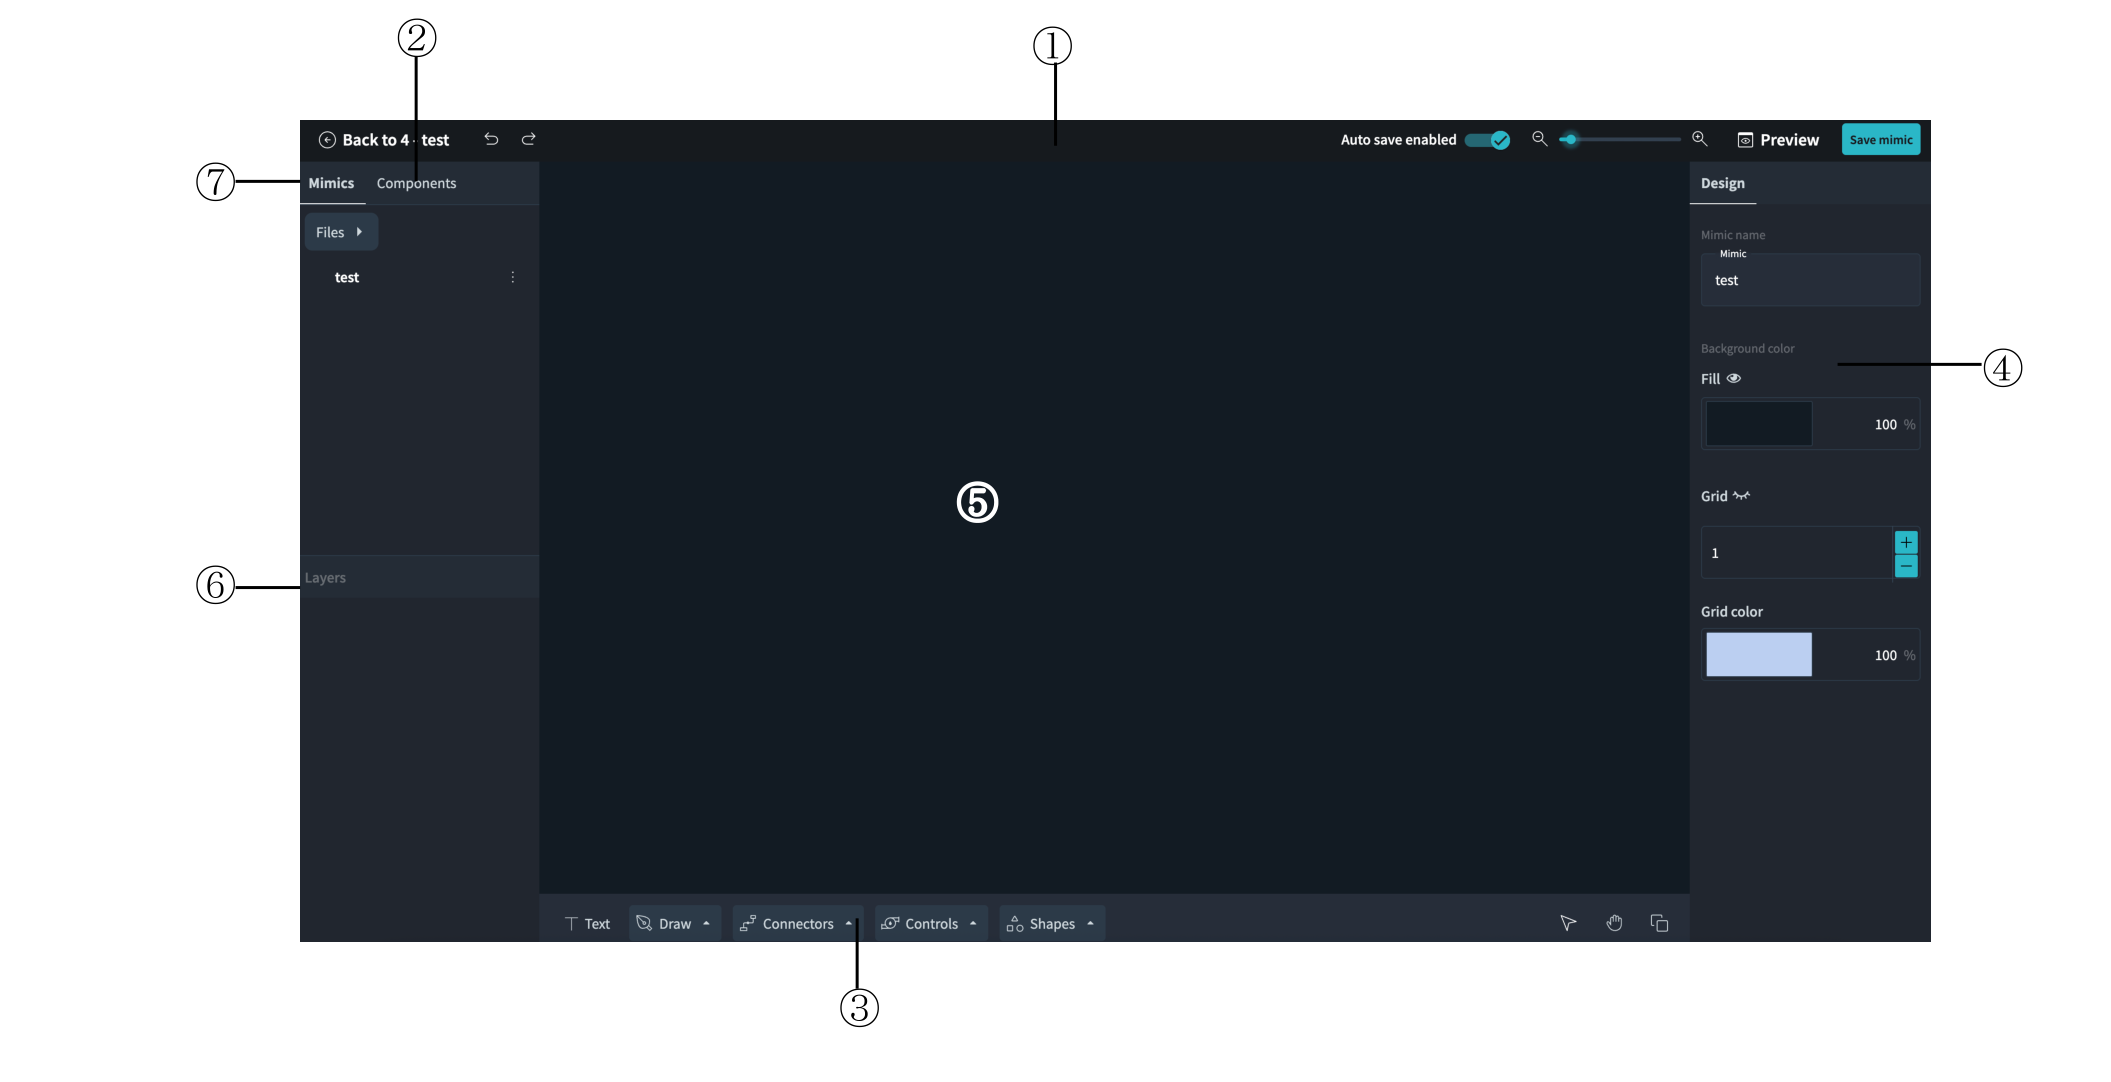
| No | Item | Description | Reference |
|---|---|---|---|
① |
Top bar |
Area that displays the editing buttons, the auto save setting, and the zoom |
13-1 |
② |
Mimics tab |
Area that displays the mimics and the folders |
13-2 |
③ |
Components tab |
Area that displays the components that can be placed on a mimic |
13-3 |
④ |
Layers |
Area that displays the objects placed on the mimic |
13-4 |
⑤ |
Canvas |
Area that displays the mimic being edited |
- |
⑥ |
Drawing toolbar |
Area that displays the tools that draw objects |
13-4 |
⑦ |
Design panel |
Area that displays the properties of the mimic and of the selected object |
13-5 |
|
EDIT authority is required to create or edit a mimic. |
① Top Bar
The top bar is displayed at the top of the mimic editor.

| No | Item | Description |
|---|---|---|
① |
[Back to] button |
Button that closes the mimic editor and returns to the mimic list |
② |
Undo icon |
Icon that cancels the last operation |
③ |
Redo icon |
Icon that performs the cancelled operation again |
④ |
Auto save enabled |
Switch that enables and disables the automatic saving of the mimic |
⑤ |
Zoom slider |
Slider that changes the display ratio of the canvas |
⑥ |
[Preview] button |
Button that displays the mimic in the display mode |
⑦ |
[Save mimic] button |
Button that saves the mimic |
Creating a New Mimic
This function is used to create a new mimic.
-
Touch the Mimics tab.
The list of the mimic folders and the mimics is displayed.
-
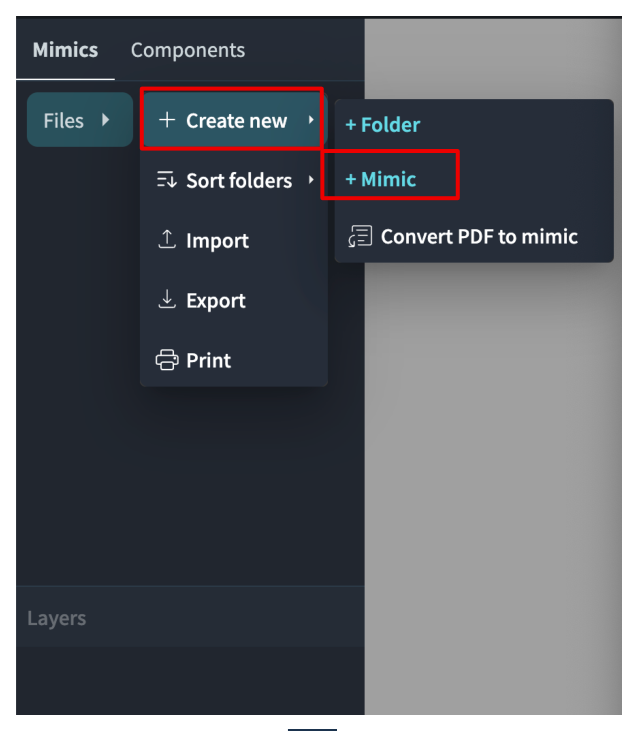
Touch the [Files] button.
The file menu appears.
-
Select [Create new], and then select [Mimic].
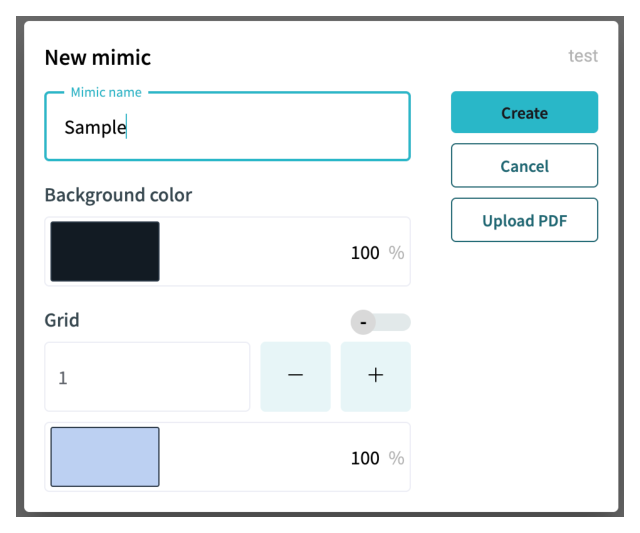
The New mimic window appears.
-
Enter the name of the mimic in Mimic name.
-
Set Background color, Grid, and Grid color as required.
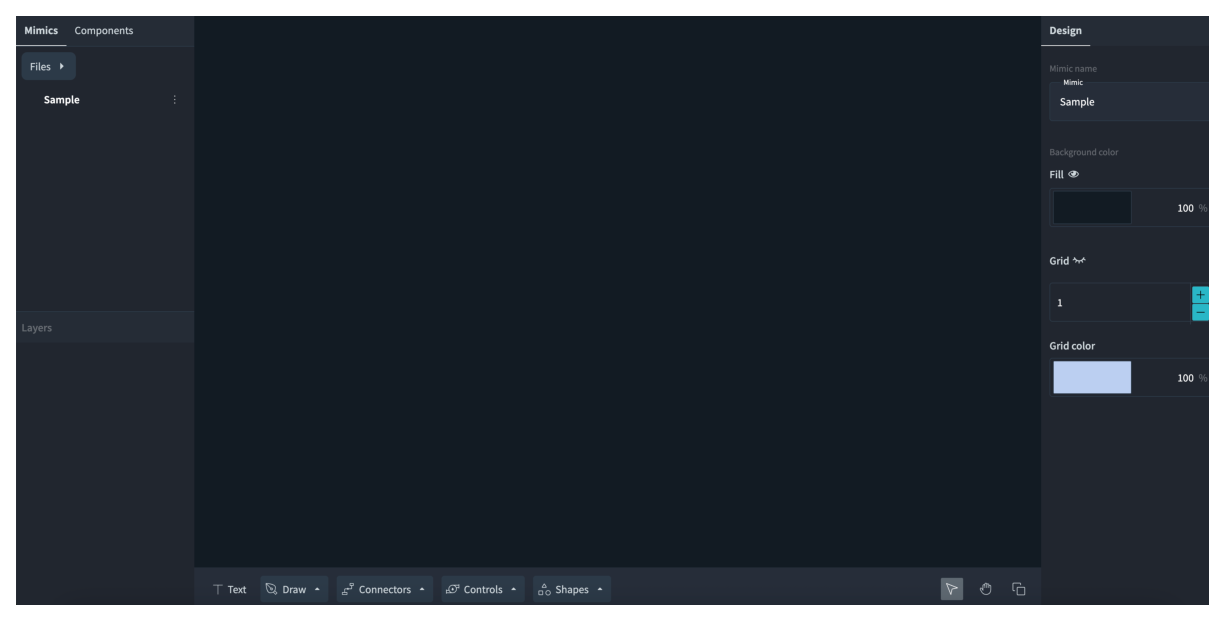
The mimic is created and displayed on the canvas.
|
The mimic name must be unique within the same folder. |
Opening a Mimic
-
Touch the Mimics tab.
-
Select the mimic in the list.
The mimic is displayed on the canvas.
Setting the Mimic Properties
The mimic properties define the name, the background, and the grid of the mimic.
-
Touch an empty area of the canvas.
The mimic properties are displayed in the Design panel.
-
Change the required items.
The setting becomes effective.
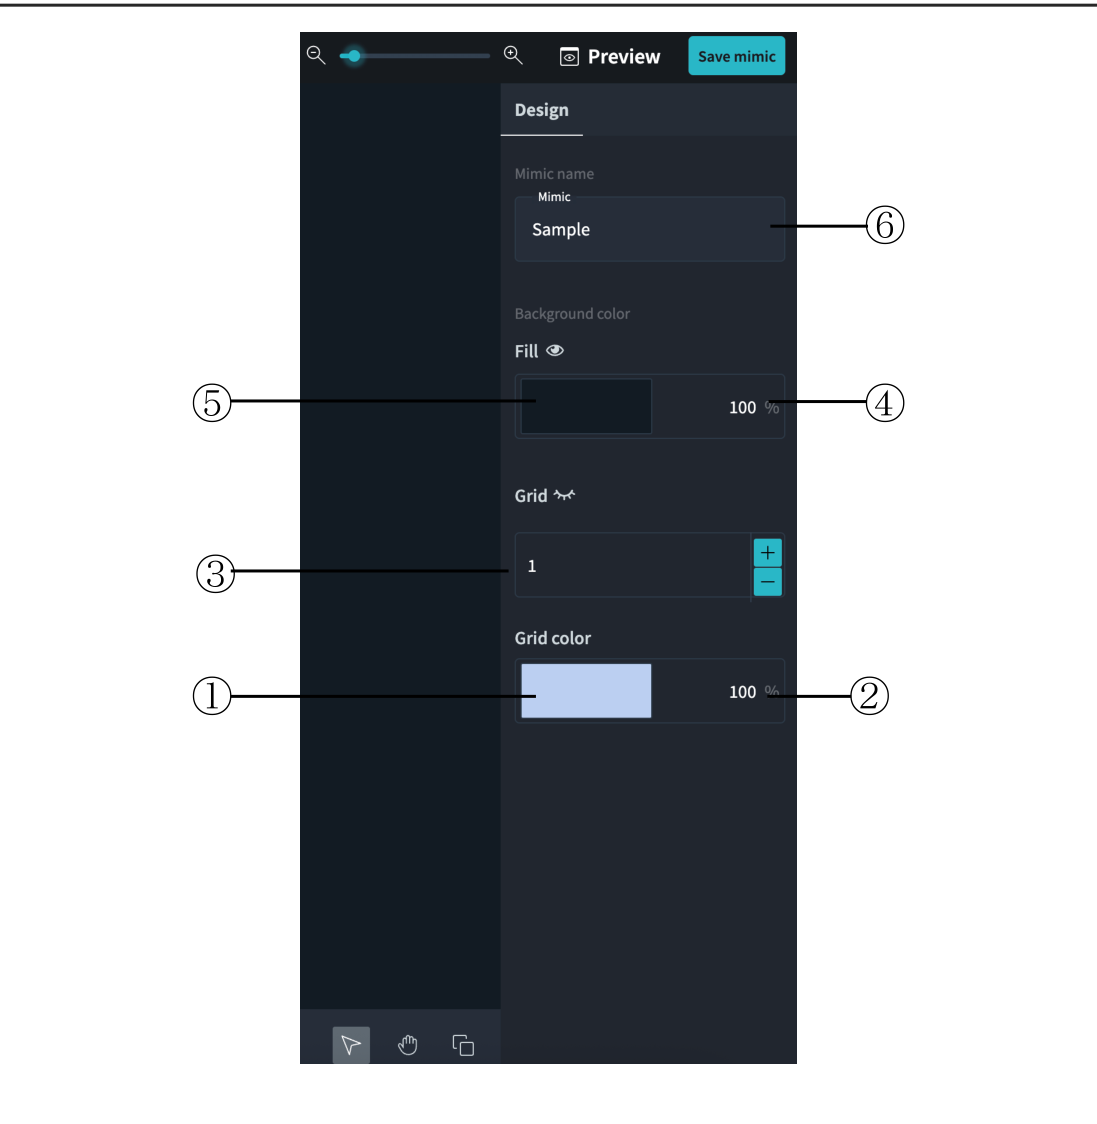
| No | Item | Description |
|---|---|---|
① |
Mimic name |
Name of the mimic |
② |
Background color - Fill |
Background color of the mimic |
③ |
Background color - % |
Opacity of the background color (0 to 100 %) |
④ |
Grid |
Interval of the grid displayed on the canvas |
⑤ |
Grid color |
Color of the grid |
⑥ |
Grid color - % |
Opacity of the grid color (0 to 100 %) |
|
Touch the eye icon next to Fill to display or hide the background color. |
Displaying the Preview
The preview displays the mimic in the same form as the monitoring screen.
-
Touch the [Preview] button.
The preview of the mimic is displayed.
-
Touch the [Preview] button again.
The editor returns to the editing mode.
Changing the Display Ratio
-
Drag the zoom slider in the top bar.
The display ratio of the canvas is changed.
Touch the minus icon at the left of the slider to reduce the display ratio. Touch the plus icon at the right of the slider to increase the display ratio.