Create / Edit / Delete Channel Rows
Overview
After importing channel sheet, channel data can be further created, edited and deleted.
In case of need, channel data can be also created from scratch on Channel sheet page.
In this section, we will focus on channel rows.
Create channel rows
Channel row is created by inserting blank row into the sheet.
There are 2 options:
-
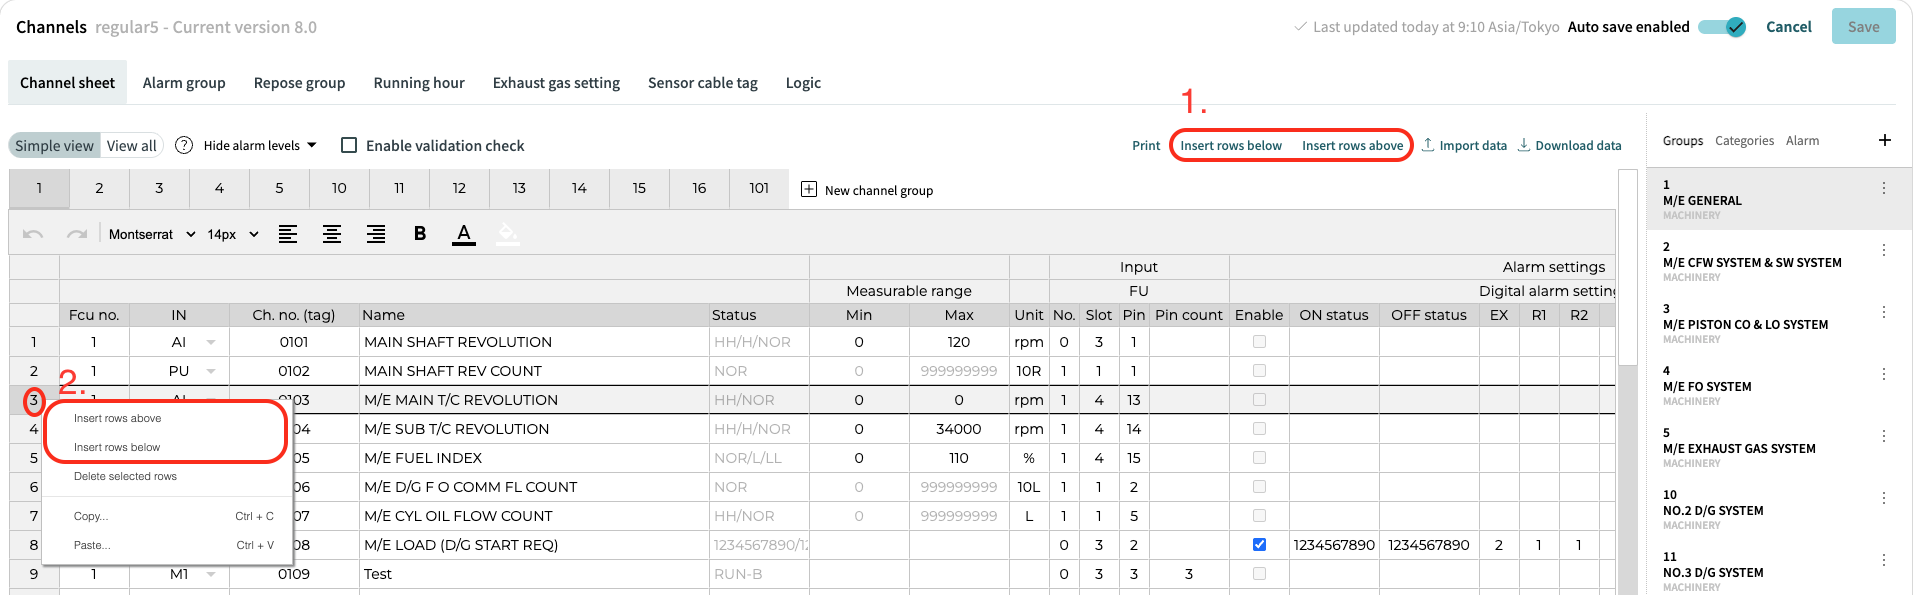
Select existing channel row and use "Insert rows below" or "Insert rows above" buttons in the toolbar.
-
Right click on desired channel row and use "Insert rows below" or "Insert rows above" buttons in the context menu.
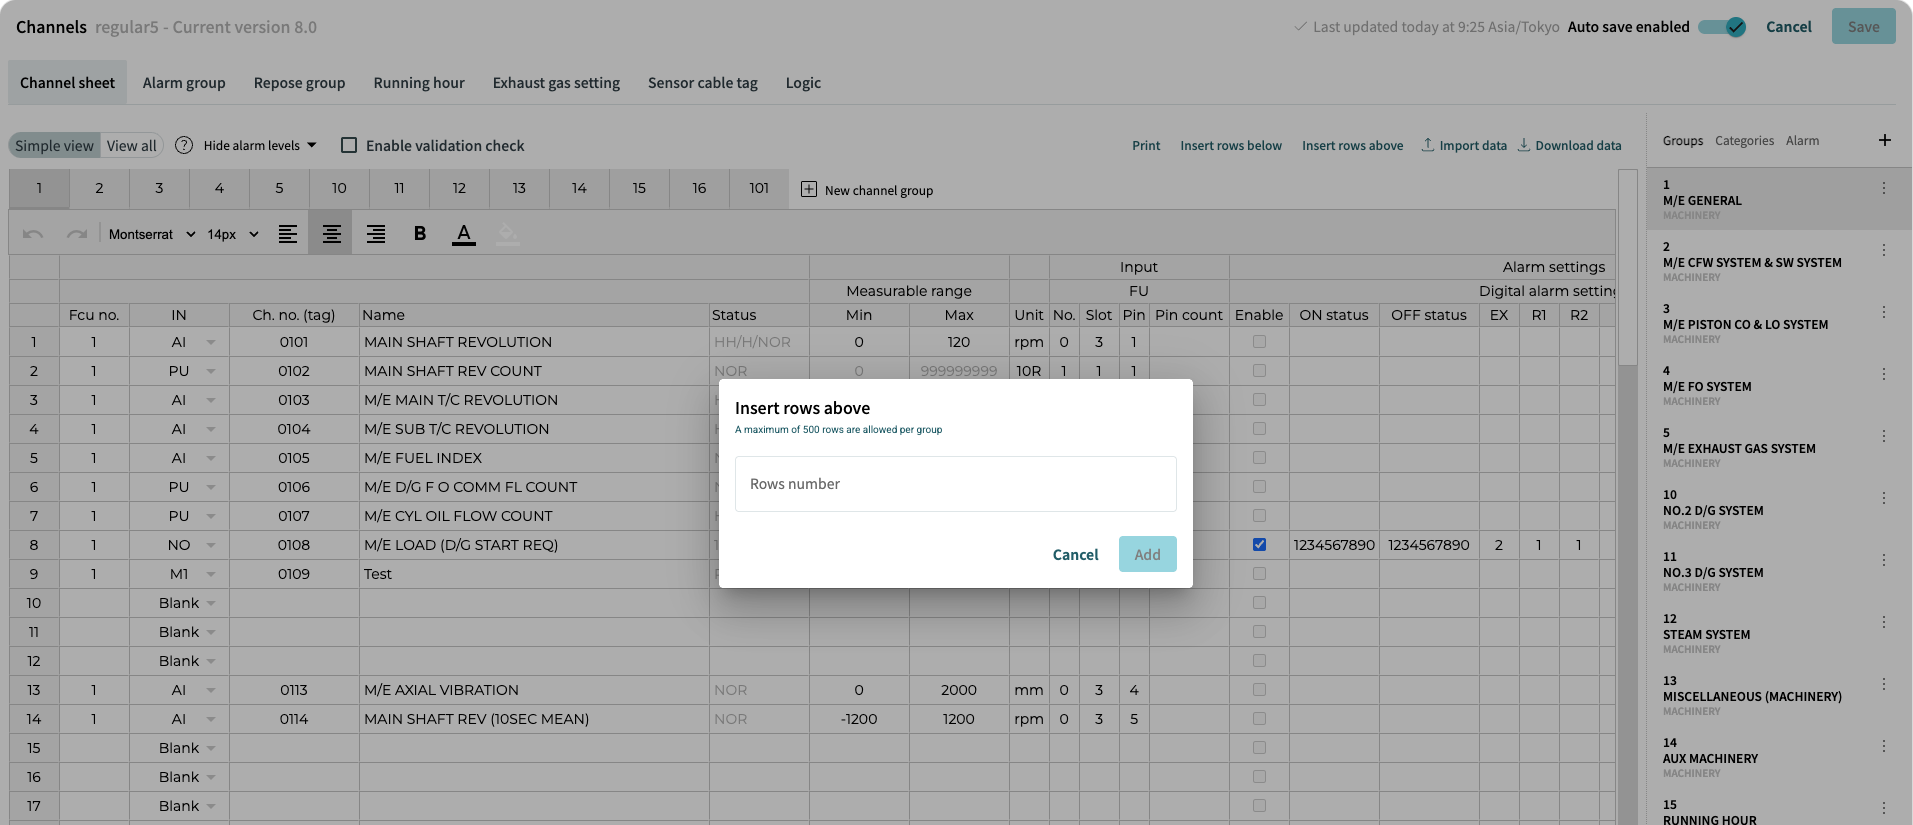
Both options will open dialog allowing insertion of multiple rows.
Edit channel rows
Cells of inserted rows can be edited and input validated.
Every channel row has enabled and disabled cells for editing depending on the column, channel type etc.
Validation check can be turned on from the toolbar.
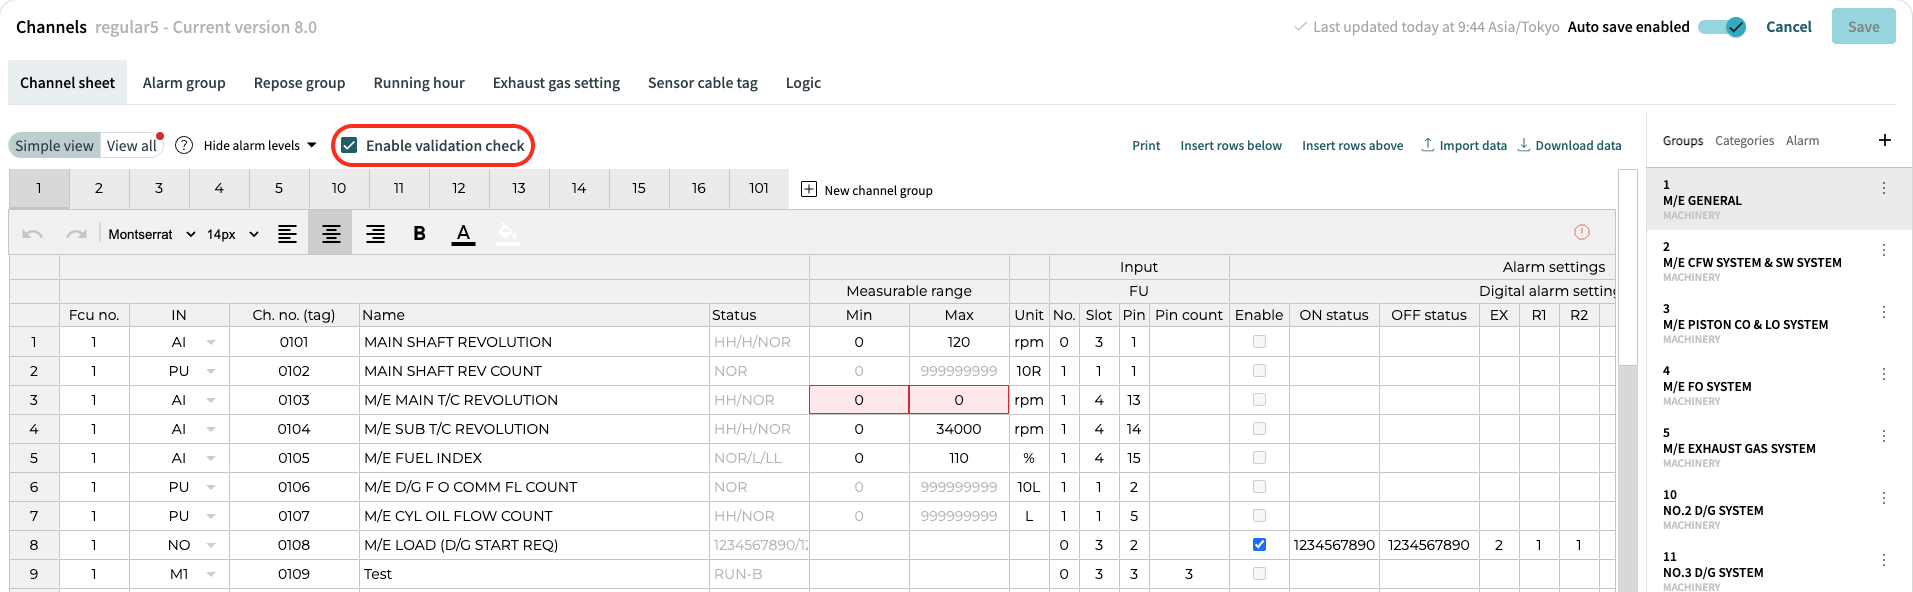
Clicking on the warning icon will reveal a list of validation warnings. This list is scrollable.
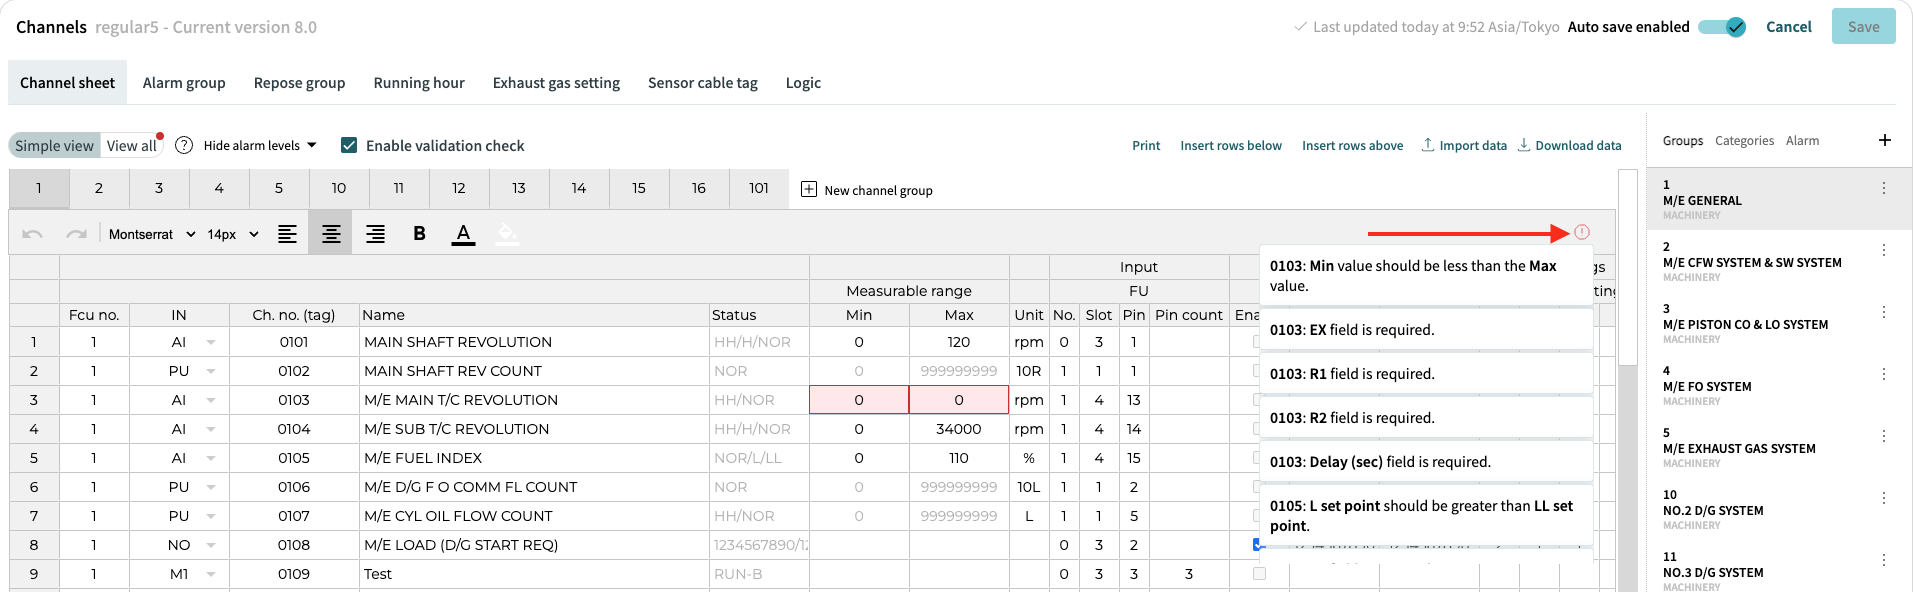
If issue can be seen only in "View all" mode, this is indicated by red dot next to the "View all" switch.
Delete channel rows
Single or multiple rows can be deleted at once.
To select multiple channel rows, hold left click and drag cursor through desired channel rows.
Open context menu by right click and select "Delete selected rows".
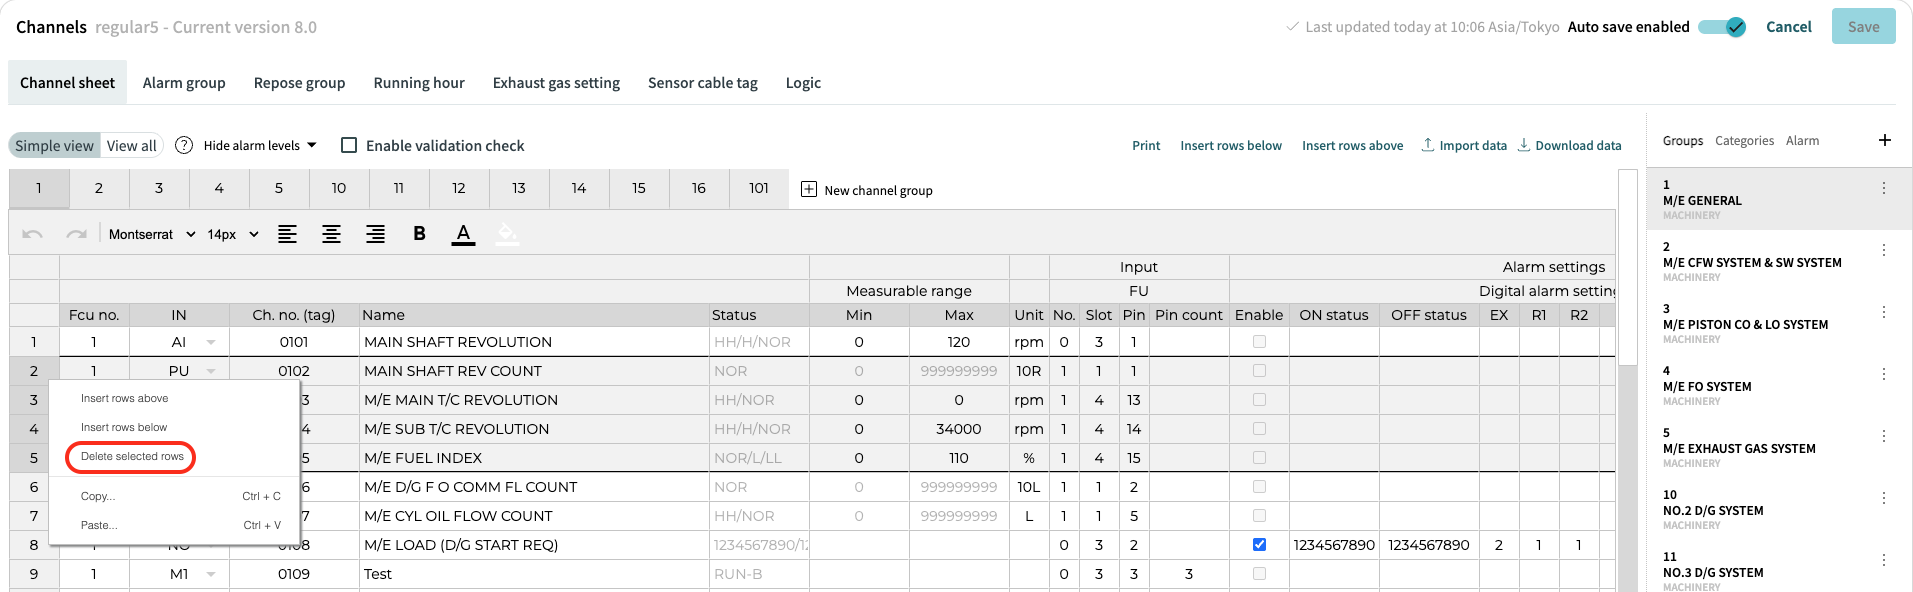
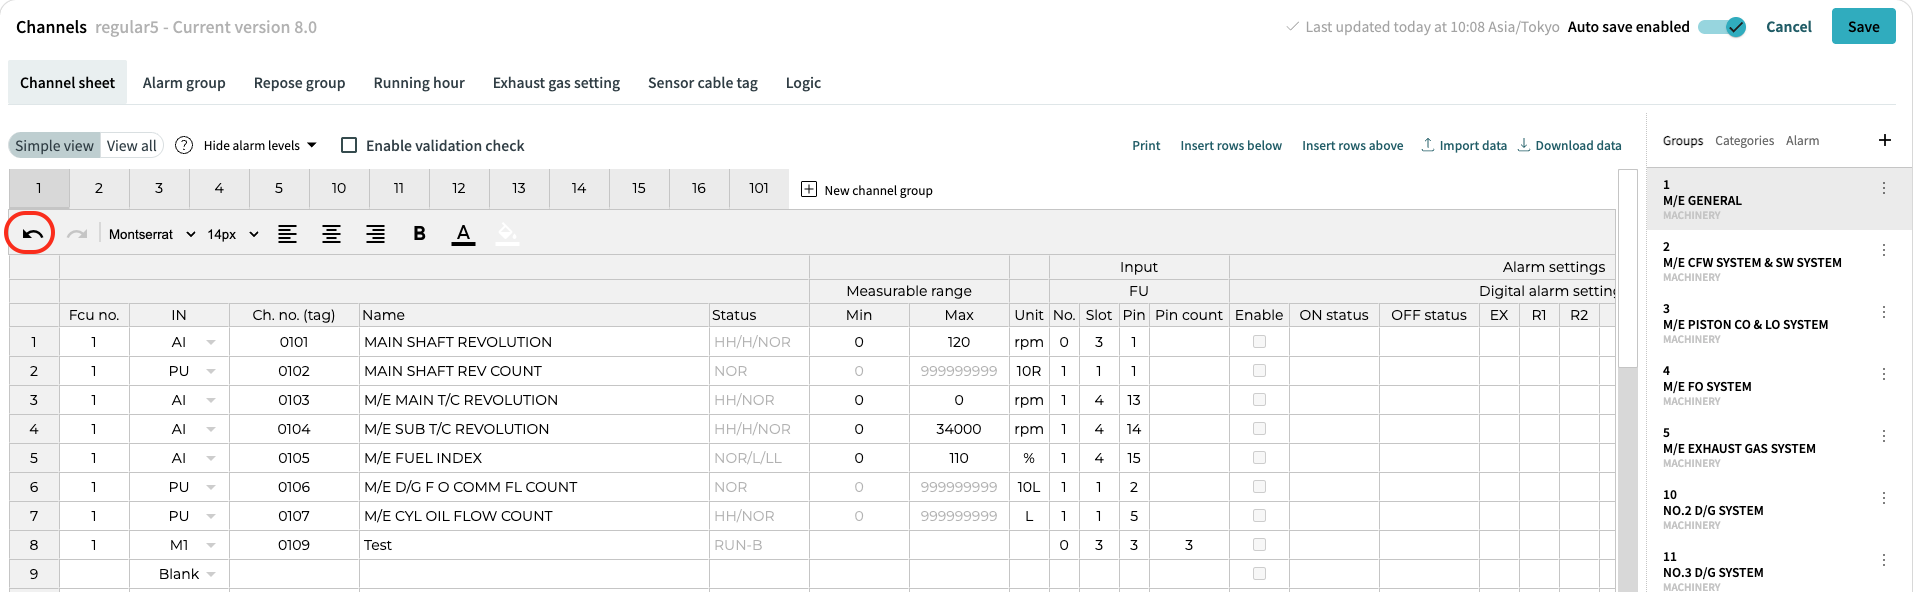
If you want to reverse changes, you can use Undo button in the toolbar.